How to Grow Your Own Tomatoes, Part 2: Transplanting

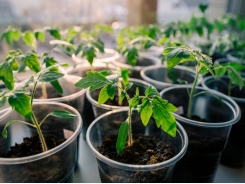
You’ve sowed your tomato seeds, and now the seedlings stand like little green soldiers in your window, patiently waiting to be liberated from their pots and plunked into a warm bed of earth. What they don’t realize is that conditions are harsh in the outside world. Between desiccating winds, the heat of the sun, and armies of bugs and diseases that may be waiting in ambush, there is much that can go wrong for a young tomato plant. To help them along, there are two things you need to do before you transplant your seedlings: Prepare the soil and something gardeners call hardening off.
Hardening Off
“Hardening off” tomato seedlings means gradually introducing them to the outdoors. This should happen over a 10-day period. Acclimating tomato seedlings to outdoor conditions is a bit like helping your child adjust to kindergarten—it takes plenty of patience and hand-holding.
- Find a sheltered place outside where the seedlings can sit in filtered sunlight, out of the wind. One option is to string a shade cloth overhead and on the windward side.
- Take your tomato seedlings outside and leave them in this protected place for a few hours on day one.
- Bring them back inside.
- On day two, leave them outdoors for a little longer.
- Continue taking them back and forth each day, leaving them out a little longer each time and slowly increasing their sun exposure by inching them out of the shade.
- After five or six days of going back and forth, leave the seedlings out overnight for the remaining four or five days. Keep an eye on the weather and bring them in if there is any danger of frost.
Soil Preparation
The warmer the soil is, the faster they will grow. And because heavy, waterlogged soil covered in weeds or cover crops is slow to warm up in spring, it’s helpful to prepare tomato beds a week or more before transplanting. Day one of the hardening-off period is a good time to start preparing the soil. Tomatoes prefer a location with 8 hours or more of direct sunlight and rich, well-drained soil.
- Using a Rototiller or a digging fork, loosen the soil to a depth of at least 8 inches.
- Spread 2 or 3 inches of compost over the surface and thoroughly mix it into the soil.
- Using a hard metal rake, sculpt the loose soil into a low broad mound no more than 4 feet wide.
Transplanting
Tomatoes are ready for transplanting into the garden when the seedlings are 3 to 4 inches tall, and the nighttime temperatures are consistently above 50 degrees. Consult a biodynamic calendar or farmer’s almanac to time your planting according to the optimal alignment of the moon and other celestial bodies—or just plant them when you have the time.
- Dig a hole in the middle of your tomato bed that is at least a few inches deeper than the depth of the pot the seedlings are in. Check the seed package for the recommended spacing between seedlings for each variety you are planting. Spacing is based on the mature size of the plant and may range from 30 to 60 inches (avoid the temptation to plant the tiny seedlings closer together—overcrowding can contribute to the spread of diseases).
- Remove each seedling from its container and loosen the roots very gently.
- Plant the seedlings deep with only the topmost leaves aboveground. This technique is a death knell for some plants, but it helps tomatoes in many ways, improving drought tolerance, root establishment and wind resistance.
- Tamp the soil firmly around the seedlings with your hands and then give them their first watering.
Tips
A lot can go awry in the short life of a tomato plant, so take a few extra steps to give your seedlings the best chance for success:
- Tomatoes need slightly acidic soil conditions (a pH between 6 and 6.8 is ideal). You can test your soil pH with a kit available at most garden centers, though your local cooperative extension office likely offers the service for a small fee, too. Excessively acidic soil is remedied by adding lime; alkaline soil requires sulfur to lower the pH. It takes a few months to adjust the pH, so the fall before planting is the best time to add these amendments.
- A long list of soil-borne pathogens prey on tomato plants, so it’s best to avoid planting them in the same part of the garden for too many years in a row. If last year was a bad year for blights or other tomato diseases, this year is a good time to move them to a different area.
- After preparing beds for tomatoes, covering the soil with black plastic for a few weeks prior to planting is one way to get it warm. The air temperature may be above 50 degrees at night, but the soil is always colder. Black plastic absorbs the heat of the sun during the day and transfers it to the soil so it’s toasty once the seedlings go in. In cool climates with a short growing season, you can leave the plastic for the first few weeks after planting, putting the seedlings in the ground via a small slit.
- A healthy dressing of compost at planting time is a must for tomatoes, but adding some fertilizer ensures they get off to a strong start. One method is to dig a trench down the middle of the bed, a couple inches below the depth where the roots will be planted, and spread a band of fertilizer for them to grow into. A bone meal-based fertilizer, which is high in phosphorus, is best for root establishment. A few weeks after planting, a fertilizer with a higher nitrogen content (such as those with blood meal, fish emulsion, or bat guano) can be applied on the surface of the beds to support lush vegetative growth.
- Water your seedlings whenever the soil dries out an inch or two below the surface, which may be daily if a heat wave comes early. After three or four weeks of growth, mulch the beds with a thick layer of straw to conserve moisture and keep the weeds down.
Related news
Tools

Phối trộn thức ăn chăn nuôi

Pha dung dịch thủy canh

Định mức cho tôm ăn

Phối trộn phân bón NPK

Xác định tỷ lệ tôm sống

Chuyển đổi đơn vị phân bón

Xác định công suất sục khí

Chuyển đổi đơn vị tôm

Tính diện tích nhà kính

Tính thể tích ao


 How to Grow Your Own Tomatoes, Part 3:…
  How to Grow Your Own Tomatoes, Part 1:…