How to Build a Straw Bale Garden
When I moved into my new Philadelphia rowhouse, I was determined to grow the vegetable garden that had eluded me all those years in a cramped Manhattan apartment. But reality struck with the first thrust of my shovel: my soil a cocktail of concrete shards and construction debris mixed with a bit of sand and dirt was useless.
Faced with the expense (OK, and effort) of building raised beds, I decided instead to go cheap and easy: a straw bale garden. So I called up Joel Karsten, author of Straw Bale Gardens, and lead authority on all things straw.
Karsten argues that straw is an ideal “container” for growing vegetables. “The hollow tubes are designed by Mother Nature to suck up and hold moisture,” he told me. And as the insides of the bales decompose, they provide a rich medium for vegetable growth.
You can put together a straw bale garden right on your lawn, your driveway (oh yes, your neighbors will love you) or anywhere that gets at least six to eight hours of sun. It’s especially good for growers who live in northern climes with shorter growing seasons the bales heat up much quicker than soil, stimulating early-season root growth.
Here’s the method that has made Karsten the go-to guru for straw bale gardening:

1. Source your straw
You can toss the dice like I did and purchase straw bales from your local garden center, but it’s best to source them direct from the farm. If you want to garden organically, the person at the garden center won’t likely know how the straw was grown. To help connect farmers with growers, Karsten has set up a user-generated marketplace, but it’s still too small to be useful to most gardeners. Remember, straw is easiest to come by in the fall. If you arrange your straw bale garden before the winter, you’ll be all set to plant when springtime comes.

2. Position your bales
Before you set up your bales, lay down landscape fabric to prevent weeds from growing up through the bales. Arrange the bales side by side in rows, with their cut sides up. The strings that bind the bales should run across the sides, not across the planting surface. The strings will help keep the shape of the bales as they start to soften and decompose.

3. Condition the bales
Two weeks before you plant, you have to get the bales cooking. This means wetting and fertilizing the bales for roughly 10 days to start composting the inner straw. For the first six days, put down 3 cups of organic fertilizer per bale every other day, and water the bales to push the fertilizer down and thoroughly saturate the straw. On the off days, simply water the bales. (Tip: try to ignore the neighbors staring suspiciously from their windows.) Days 7 through 9, lay down 1.5 cups of organic fertilizer each day and water. Day 10 put down 3 cups with phosphorus and potassium (bone or fish meal mixed with 50% wood ash works like a charm).
If you stick your finger into your bales, they’ll be hot and moist. You’ll start to see some “peppering” black soil-like clumps that signal the beginning of the composting that will continue through the growing season. If mushrooms sprout up, rejoice they won’t harm your plants; it means the straw is decomposing as it should.

4. Build a trellis and greenhouse in one
One of the coolest things about straw bale gardening is that it combines the best of container gardening with vertical gardening. Karsten recommends erecting seven-foot-tall posts at the end of each row of bales, and running wire between them at intervals of 10 inches from the tops of the bales. As your seeds sprout, you can use the bottom wire to drape a plastic tarp to create an instant greenhouse for those chilly early-season nights. And as the plants begin to grow, the wire works like a vertical trellis, supporting your cucumbers, squash and assorted viney vegetables.

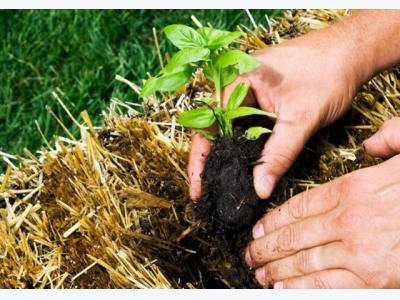
5. Time to plant
If you’re planting seedlings, use your trowel to separate the straw in the shape of a hole and add some sterile planting mix to help cover the exposed roots. If you’re planting seeds, then cover the bales with a one to two-inch layer of planting mix and sew into this seedbed. As the seeds germinate, they’ll grow roots down into the bale itself. While you’re at it, plant some annual flowers into the sides of the bales, or some herbs it’s otherwise underutilized growing space, and will make the garden a whole lot lovelier.

6. Look, ma no weeding
If you lay a soaker hose over your bales, you’ve pretty much eliminated all your work until harvest. That’s because your “soil” doesn’t contain weed seeds. There’s one caveat, though if you didn’t get your straw from a farmer (guilty as charged), there’s a chance your straw (or, worse, hay that was sold as straw) contains its own seed. If your bales start to sprout what looks like grass, you can beat back the Chia pet effect by washing the sprouts with diluted vinegar. If you don’t mind the look though, the grass shouldn’t harm your plants, and will likely die off from the heat produced by the bale’s decomposition.

7. The harvest after the harvest
When the harvest season ends, the bales will be soft, saggy and gray but that’s exactly what you want. Because when you pile the straw together and leave it to compost over winter, you’ll have a mound of beautiful compost to fill all your pots and planters in the spring.
About Author: Nicole Cotroneo Jolly (@nicolecotroneo) is a journalist, filmmaker, and founder of How Does it Grow? — a series of food education videos that trace our food back from the fork to the field.
Related news

Tools

Phối trộn thức ăn chăn nuôi

Pha dung dịch thủy canh

Định mức cho tôm ăn

Phối trộn phân bón NPK
Xác định tỷ lệ tôm sống

Chuyển đổi đơn vị phân bón
Xác định công suất sục khí
Chuyển đổi đơn vị tôm

Tính diện tích nhà kính

Tính thể tích ao
 How to Grow Citrus Indoors
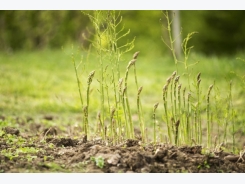
  How to Plant Asparagus