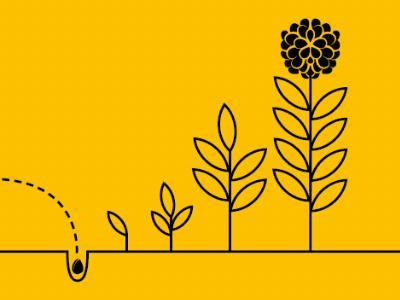
From start to finish: how to grow your own from seed
Back in the last millennium, before cloning swept the country like the hula hoop, people actually grew cannabis plants from seed. Primitive, huh? But where there’s a will, they’ll surely find a way. While that’s all changed now (hello, cloning!) you can only clone so many times before you have to buy more plants or get back to basics with seeds.
Growing from seed is all about the quality of your seeds. Plants will never be better than the seeds they grew from. Back in the day, there weren’t any seed shops, so seeds were saved from exceptional buds, but it was all a crapshoot with a lot of trial and error. Luckily, now we know better.
Starting from seed isn’t difficult and you don’t need to be an experienced gardener, but the process is a journey in stages, not a direct flight. Cannabis plants are perfect for growing from seed because they have a short life cycle. That being said, be prepared to check your plants every day for moisture, insects, diseases, nutrient deficiencies and light. If you can’t make the time and work commitment, perhaps you should forget the idea. Here’s my list of what I used for my first grow. Nothing high-tech—my growroom was a walk-in closet with louvered doors and a clothes bar to hang my lights.
- A four-foot table or two sawhorses with plywood on top
- A piece of thick plastic or a waterproof tablecloth for spill protection
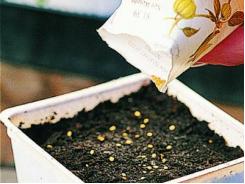
- Potting soil for seedlings
- Clean sand
- Five-gallon pail for mixing soil
- A four-foot shop light with chains and S hooks
- One full-spectrum red fluorescent grow light
- One regular white fluorescent tube bulb
- Light timer
- Five-ounce opaque drink cups
- Eight-ounce drink cups
- pH kit
- Plant flats or trays
- Plastic kitchen wrap
LIGHTING
If you’re on a budget, fluorescents offer the biggest bang for your buck. Don’t forget to factor in the cost of electricity and bulb replacement. To make sure all my plants got an equal amount of light, I turned the trays 180 degrees every day. I especially liked the ease of raising the shop light one link at a time as the plants grew. You can maximize your light by using a room with white walls or surrounding your grow table with movable reflecting foil-covered cardboard or hanging sheets of Mylar—mirrors don’t work well for reflecting light.
“The beauty of starting seedlings in the opaque cups is that you can see the root growth.”
GERMINATION
Mature cannabis seeds are dark brown, sometimes with swirly patterns or stripes. Discard immature pale or greenish-colored seeds. I’ve never started seeds in soil, preferring the Japanese method of “proving” seeds first; there’s no sense planting dud seeds. I germinated my seeds in a moistened, loosely rolled up paper towel on a plate in indirect light on the kitchen counter where I could keep an eye on progress. Keep the paper towel moist, but not lying in a puddle of water or the seeds will rot.
Some seeds germinate in a couple of days, while some take up to a week, depending on their temperature. It’s helpful to know that the seeds will produce male and female plants. Back in the Dark Ages, I always started 16 cups of seeds in hope of ending up with four females. That’s no longer a problem if you can buy feminized seeds, which are guaranteed to be females. I planted two sprouted seeds about one inch apart per cup because frequently one seedling will be bigger and stronger than the other. Go with the bigger one and pinch off the smaller one at the soil level.
The beauty of starting seedlings in the opaque cups is that you can see the root growth. Poke some drainage holes around the cup bases. It’s quicker to do the drain holes with the cups in a stack. As you finish each cup, slip it in the other end of the stack or you’ll waste crumpled up cups. Mix the potting soil with enough sand to give the fluffy soil more body. Add water gradually, mixing well to moisten.
Fill the cups with the soil mix and tap each cup a couple of times on the table to eliminate air pockets. Add more soil if needed, tap it down again to leave a half-inch space between the top of the soil and the rim of the cup. Repeat until all the cups are filled. Set up your grow table and lights. Ready? The table is all set. The lights are on. The cups are shoulder to shoulder in rows, waiting to fulfill their roles.
“During the seedling phase, keep the soil moist but not wet and only water from the bottom from so the roots stretch down long and strong.”
PLANTING
My tools of choice for planting were a small wooden matchstick and a wooden toothpick. I made two small holes with the clean end of the match about one quarter inch deep and a half inch apart and not too close to the side of the cup. I picked out two sprouted seeds at a time from the paper towel, careful not to touch the sprout, and dropped them into the match holes and used the tip of a toothpick to scuff soil into the holes, then lightly tamped the spots with one finger. Keep the remaining sprouted seeds covered so they don’t dry out. Repeat until all the cups are planted.
Put as many cups that fit into shallow flats or trays and then drape a long piece of kitchen plastic wrap over everything, tucking the ends under the trays to create a mini greenhouse. When this step is finished, the plants get to sunbathe under the lights for the next six weeks or so of the seedling phase.
In a few days, two primary leaves will appear and you can do your happy dance. Soon the next pair of leaves will appear and the first ones will drop off. If condensation forms under the plastic wrap, uncover the seedlings to release the excess moisture and then replace with fresh wrap. During the seedling phase, keep the soil moist but not wet and only water from the bottom from so the roots stretch down long and strong.
WATER
Water with a spray bottle until the first leaves appear, and then water from the bottom; the soil around the stem needs to stay dry to avoid stem rot. Fill pitchers or buckets with tap water and let sit uncovered until room temperature and the chlorine has evaporated into the air. Hard water is fine, but don’t use artificially softened water because it contains too much salt and other harmful additives.
“You could use fish or seaweed emulsions or any of the other excellent natural fertilizers available at your local hydroponics supplier.”
FERTILIZER
I’m an organic gardener. While I don’t object to a little bloom booster to convince some reluctant annuals to step it up, I want everything that goes in my body to be as natural as possible. Plants need nitrogen to grow. When I had access to a mountain of free rotted horse manure, I fertilized with manure tea. Throw a shovelful of manure in a bucket, fill with water, let it sit a couple of days and water with the tea. It worked fine for me. There are “hot” manures and “cold” manures. Hot manures have the highest nitrogen, but have to be aged. Cold cow manure has lower nitrogen but can be used hot out of the barn. Rabbit manure is cold, but some growers call it nitrogen on steroids. If slogging around in barnyards doesn’t appeal to you, you could use fish or seaweed emulsions or any of the other excellent natural fertilizers available at your local hydroponics supplier.
pH
Check your soil pH regularly. Plants grown in soil like a pH about 7. If your soil drops below 6, add a light sprinkling of ground limestone before watering. If the soil is above 8—too alkaline—sprinkle around a concoction of cottonseed meal, lemon peels and ground coffee.
REPOTTING
Discontinue the plastic wrap when the third set of leaves appear. When you see that the roots have reached the bottom of the cups, it’s time to repot the little darlings into the eight-ounce cups. In my experience, the plants do better stepping up to the bigger cup instead of going directly into three-quart pots. Repotting can be tricky, so take your time here. The plants shock easily with too much jostling or rough handling. Get the larger cups ready, poke the drain holes and fill with enough soil mix so the seedlings will be at the same depth as in the first cups. Before removing from the smaller cups, lightly water them so everything stays together.
Tip the cup upside down in your open hand with the seedling stem between your fingers. Gently squeeze the sides of the cup with your other hand and the seedling will drop out in one piece. Don’t pull it out by the stem! Place the seedling in its new home, filling around it with more soil, and make sure it isn’t deeper or shallower than in the smaller cup. This is important. Compress the soil lightly for any air pockets.
“When your plants really take off, they may grow an inch a day. Keep a sharp eye on the distance between the tops of the plants and the lights.”
VEGETATIVE STAGE
During the vegetative phase, leave the lights on 24/7 and as close to the leaves as possible without touching. If the lights are too high, the stems will grow weak and spindly. You want the plants to remain compact. When your plants really take off, they may grow an inch a day. Keep a sharp eye on the distance between the tops of the plants and the lights. Fluorescents are cool and won’t burn the leaves, but keep adjusting your lights upwards to stay ahead of the growth. Rotate your plants so they all get enough light. When plants are starting to bud, rough handling or a sudden change in temperature or light will drive them into shock. When you see your plants are beginning to outgrow the cups, it’s time to pot up again, this time to three-quart containers commonly found at nurseries. Always wash used pots in hot soapy water before reusing.
SEXING
Toward the end of the vegetative and budding phase, you’ll be able to sex your plants. Males have two pollen-filled sacs that are easy to see and females have a pair of white V-shaped hairs. One male plant is enough to pollinate all your females so they produce seeds. I didn’t grow for seeds, so I quickly yanked all the male plants. Male plants are low in THC, are harsh-tasting and give many people a massive headache. Unpollinated females produce more flowers, buds and THC.
For even more plants, remove the unproductive lower stems and leaves on your plants, and then make two or three shallow downward slices on the main stem with a clean blade and insert a graft slip dipped in root stimulant in each cut. Put a small piece of tape around the cuts. The grafts can be other varieties, not just the same as the host plant. Soon you’ll have new growth from all your grafts, giving you maximum yields.
Related news
Tools

Phối trộn thức ăn chăn nuôi

Pha dung dịch thủy canh

Định mức cho tôm ăn

Phối trộn phân bón NPK
Xác định tỷ lệ tôm sống

Chuyển đổi đơn vị phân bón
Xác định công suất sục khí
Chuyển đổi đơn vị tôm

Tính diện tích nhà kính

Tính thể tích ao
 Be Bold! Grow Vegetables In Your Front Yard!
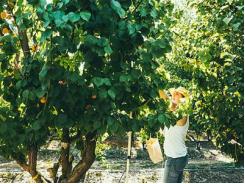
  Our essential guide to pruning fruit trees